 Loading... Please wait...
- 774-991-2658
- My Account
- Home
- Tuck Pointing
- Glitter Bits
Categories
Glitter Bits
Product Description
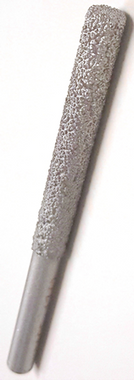
1/4" x 3.5" Long Glitter Bit
Glitter Bit Safety Instructions
- Use only with Variable Speed Die Grinders.
- Begin at lowest RPM setting with each use.
- Do not exceed Glitter Bit Safe RPM.
- Do not push, twist, bend, or apply pressure to the tip of the bit.
- Do not use unless operator understands all information on this sheet.
Install Glitter Bit in variable speed die grinder only. Make certain the shank is straight, smooth and clean.
Insert Glitter Bit into loosened collet. Insert the shank fully, but not so far as to hit bottom. Make sure bit is
fully inserted and fully tightened.
- Improperly installed bits can cause the bit to snap and cause serious injury!
Begin with the lowest setting of the grinder, typically 2,000 – 7,000 RPM. RPM speed may be increased to a level as
long as the bit doesn’t wobble. Do not use at a speed where there is vibration or wobble in the bit. Do not
exceed RPM where the bit is spinning straight and without excessive vibration. The safe RPM range for Glitter Bit
is between 7,000 and 20,000 RPM.
- Too high RPM can cause the bit to snap and cause serious injury!
Ease the bit into a mortar or the material you wish to grind away at a 30-45 degree angle. Do not push the tip of
the bit into material like a drill bit. The edges of the bit do all the grinding. Grind the mortar, ceramic tile,
granite, marble or other masonry-like products with a back and forth motion, keeping the bit at a 30-45
degree angle. The Diamond crystals on the sides of the bit do all the grinding, and will work better with
optimal speed and less pressure.
- Too much pressure can cause the bit to snap and cause serious injury!
Vacuum out the dust from grinding area. Do not let the bit continue to grind the debris or dust left in the cut.
This will greatly slow down the grinding speed and shorten the life of the bit. Use a vacuum or vacuum
attachment to clean the area after each pass. For single brick removal, use all the instructions above and
grind around the brick’s perimeter, keeping the grinder at 30-45 degrees and move the grinder back and forth
and in and out through the mortar joint. Grind no more than 3/4” deep on each pass and vacuum dust out of
mortar joint area after each pass. Continue grinding and vacuuming passes until the brick is free. Tap on face
of brick to remove it.
- Follow all safety instructions regarding use of the grinder. Eye protection and gloves must be worn when
using the Glitter Bit! Do not touch the Glitter Bit while it’s spinning. Refresh your understanding of all
safety instructions with each use.

